Help · Guide 7 of 8
Your team and validation
Invite trainers, give each person a role, and bring in a validator.
5 minutes
Watch it
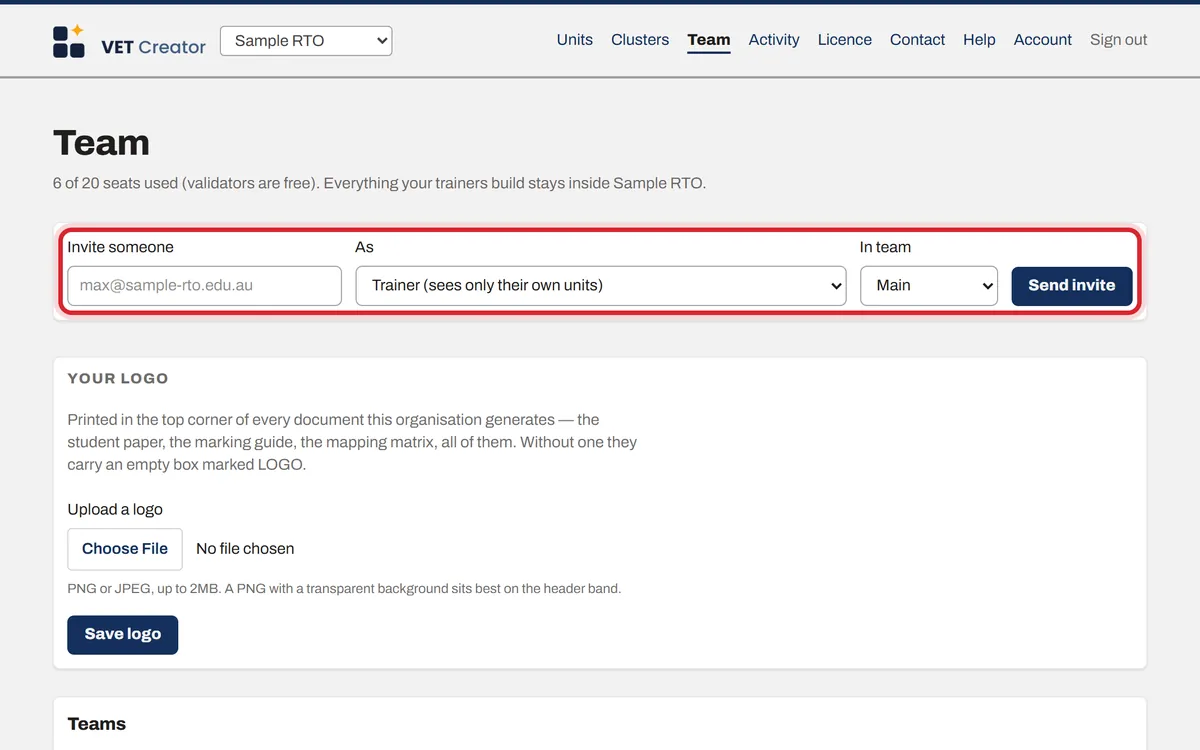
Step 1: Invite someone
The owner invites people. On Team, type their email, choose their role and their team, and press Send invite. They get an email with a link to sign in.
Step 2: Roles
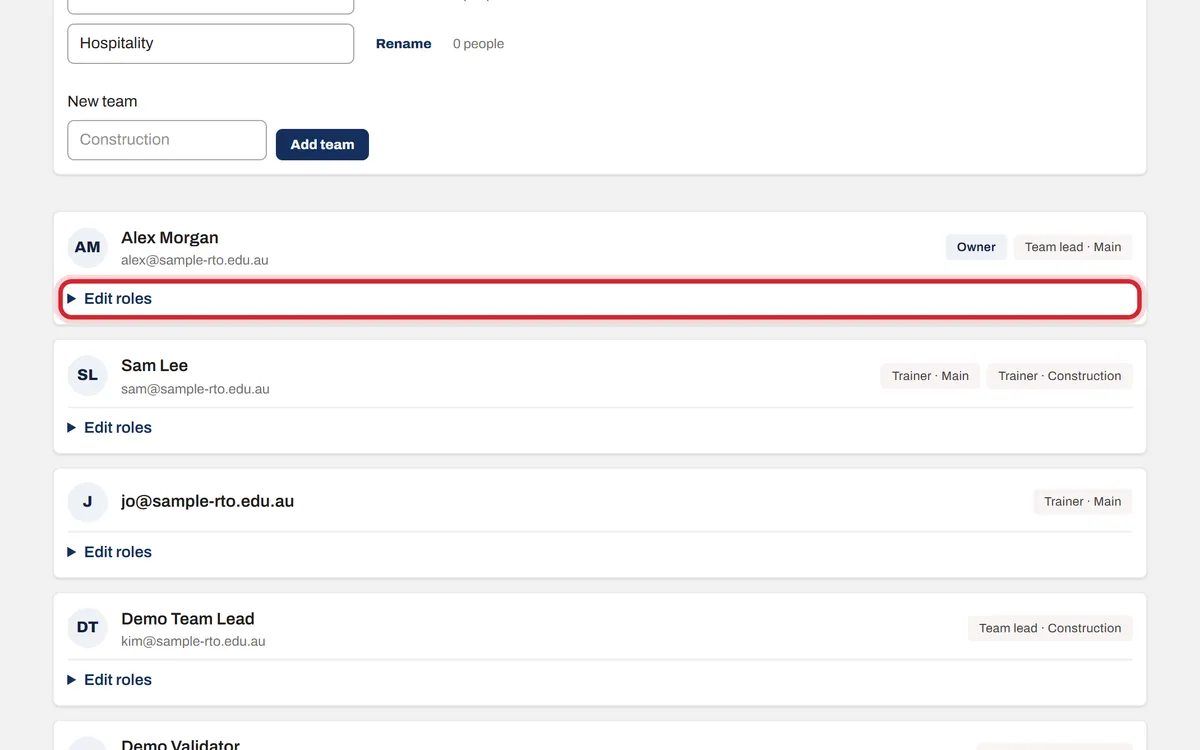
Trainers build and see their own units. Team leads see their whole team’s units. A compliance manager reads every unit and signs the compliance records. Admin staff can read everything but not edit. A validator reads only the units given to them, and takes no paid seat.
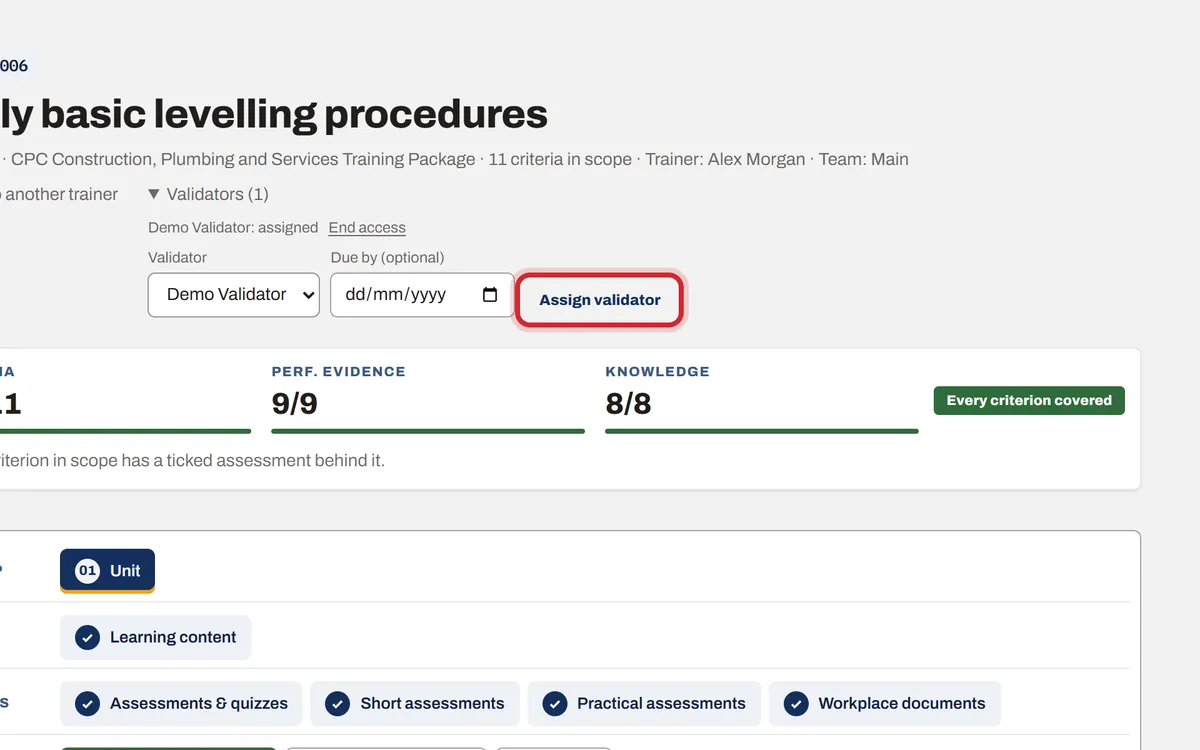
Step 3: Add a validator to a unit
On the unit, open Validators, pick the person and press Assign validator. They see that unit only. When they finish they press Mark my validation complete, and their access ends.
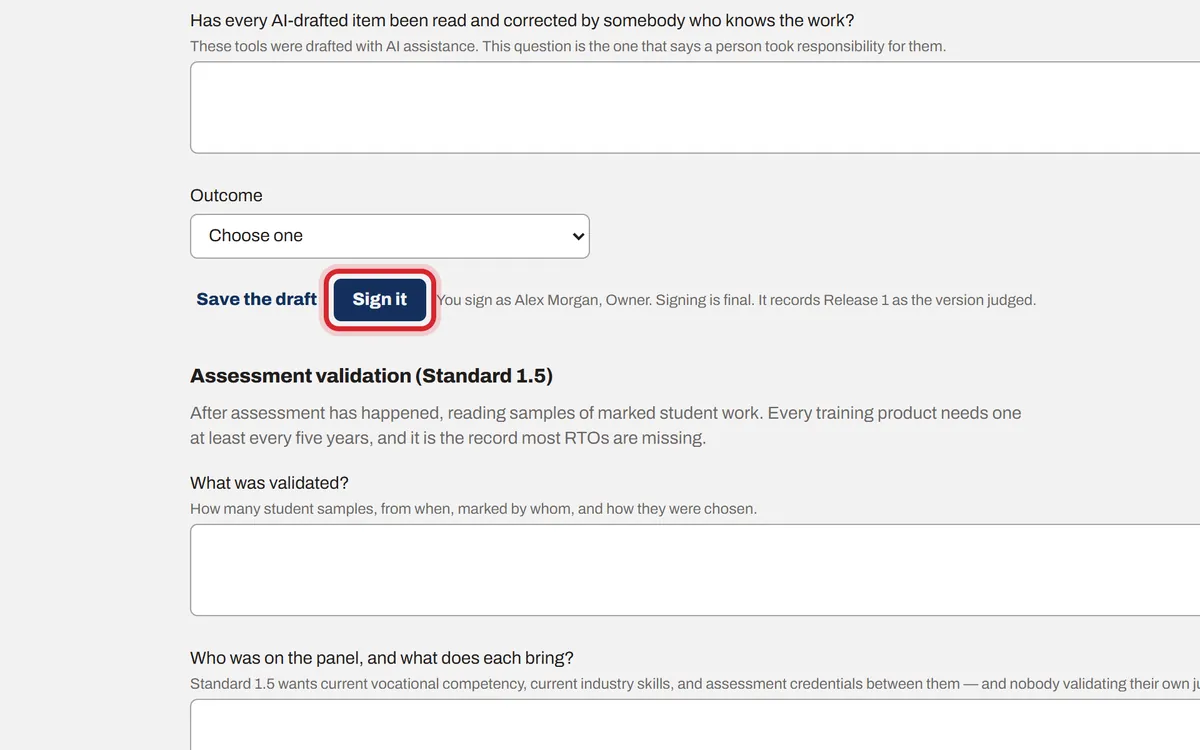
Step 4: Sign the validation record
Step 08 holds the validation records. Fill them in, press Save the draft, and when it is right, Sign it. The owner, the compliance manager or the assigned validator can sign; your name and the time are recorded.